

How you, yes you, can build your own table
How you, yes you, can build your own table
The dos and mostly don'ts of building a table


So you’ve resolved to make a table. Fantastic news. It’s going to be a disaster. You’ll love it.
There are many lessons to be learned in the wide world of woodworking, of which I have learned almost none.
But, I did build a mildly respectable beer die table a few months ago.
I embarked on this project having watched a few YouTube videos and an understanding that I’d run into some issues, but with a definite level of overconfidence about how often that would happen.
It’s going to seem like a pretty daunting task, but as long as you’re not trying to build hinges or make the thing fold, it’s going to be doable.
Visualize your masterpiece
The first step in building any table is to imagine what your perfect, finished product will look like.
It won’t look like that, but when you’re in the throes of a meltdown because you made an irreparably misguided decision, you can resort to that mental picture as a reminder of why you endeavored on this project in the first place.
Think of what you want this table to look like. Where will it sit in, or outside, of your home? What is its purpose? What is its mission statement?
Once you’ve acquired a firm mental picture, draw out a sketch with arbitrary proportions. This will not be useful, but it’s nice to have. Now you’re ready to go.
Plan what items you’ll need
This is absolutely crucial. It’s the next logical step after the esoteric visualization stage.
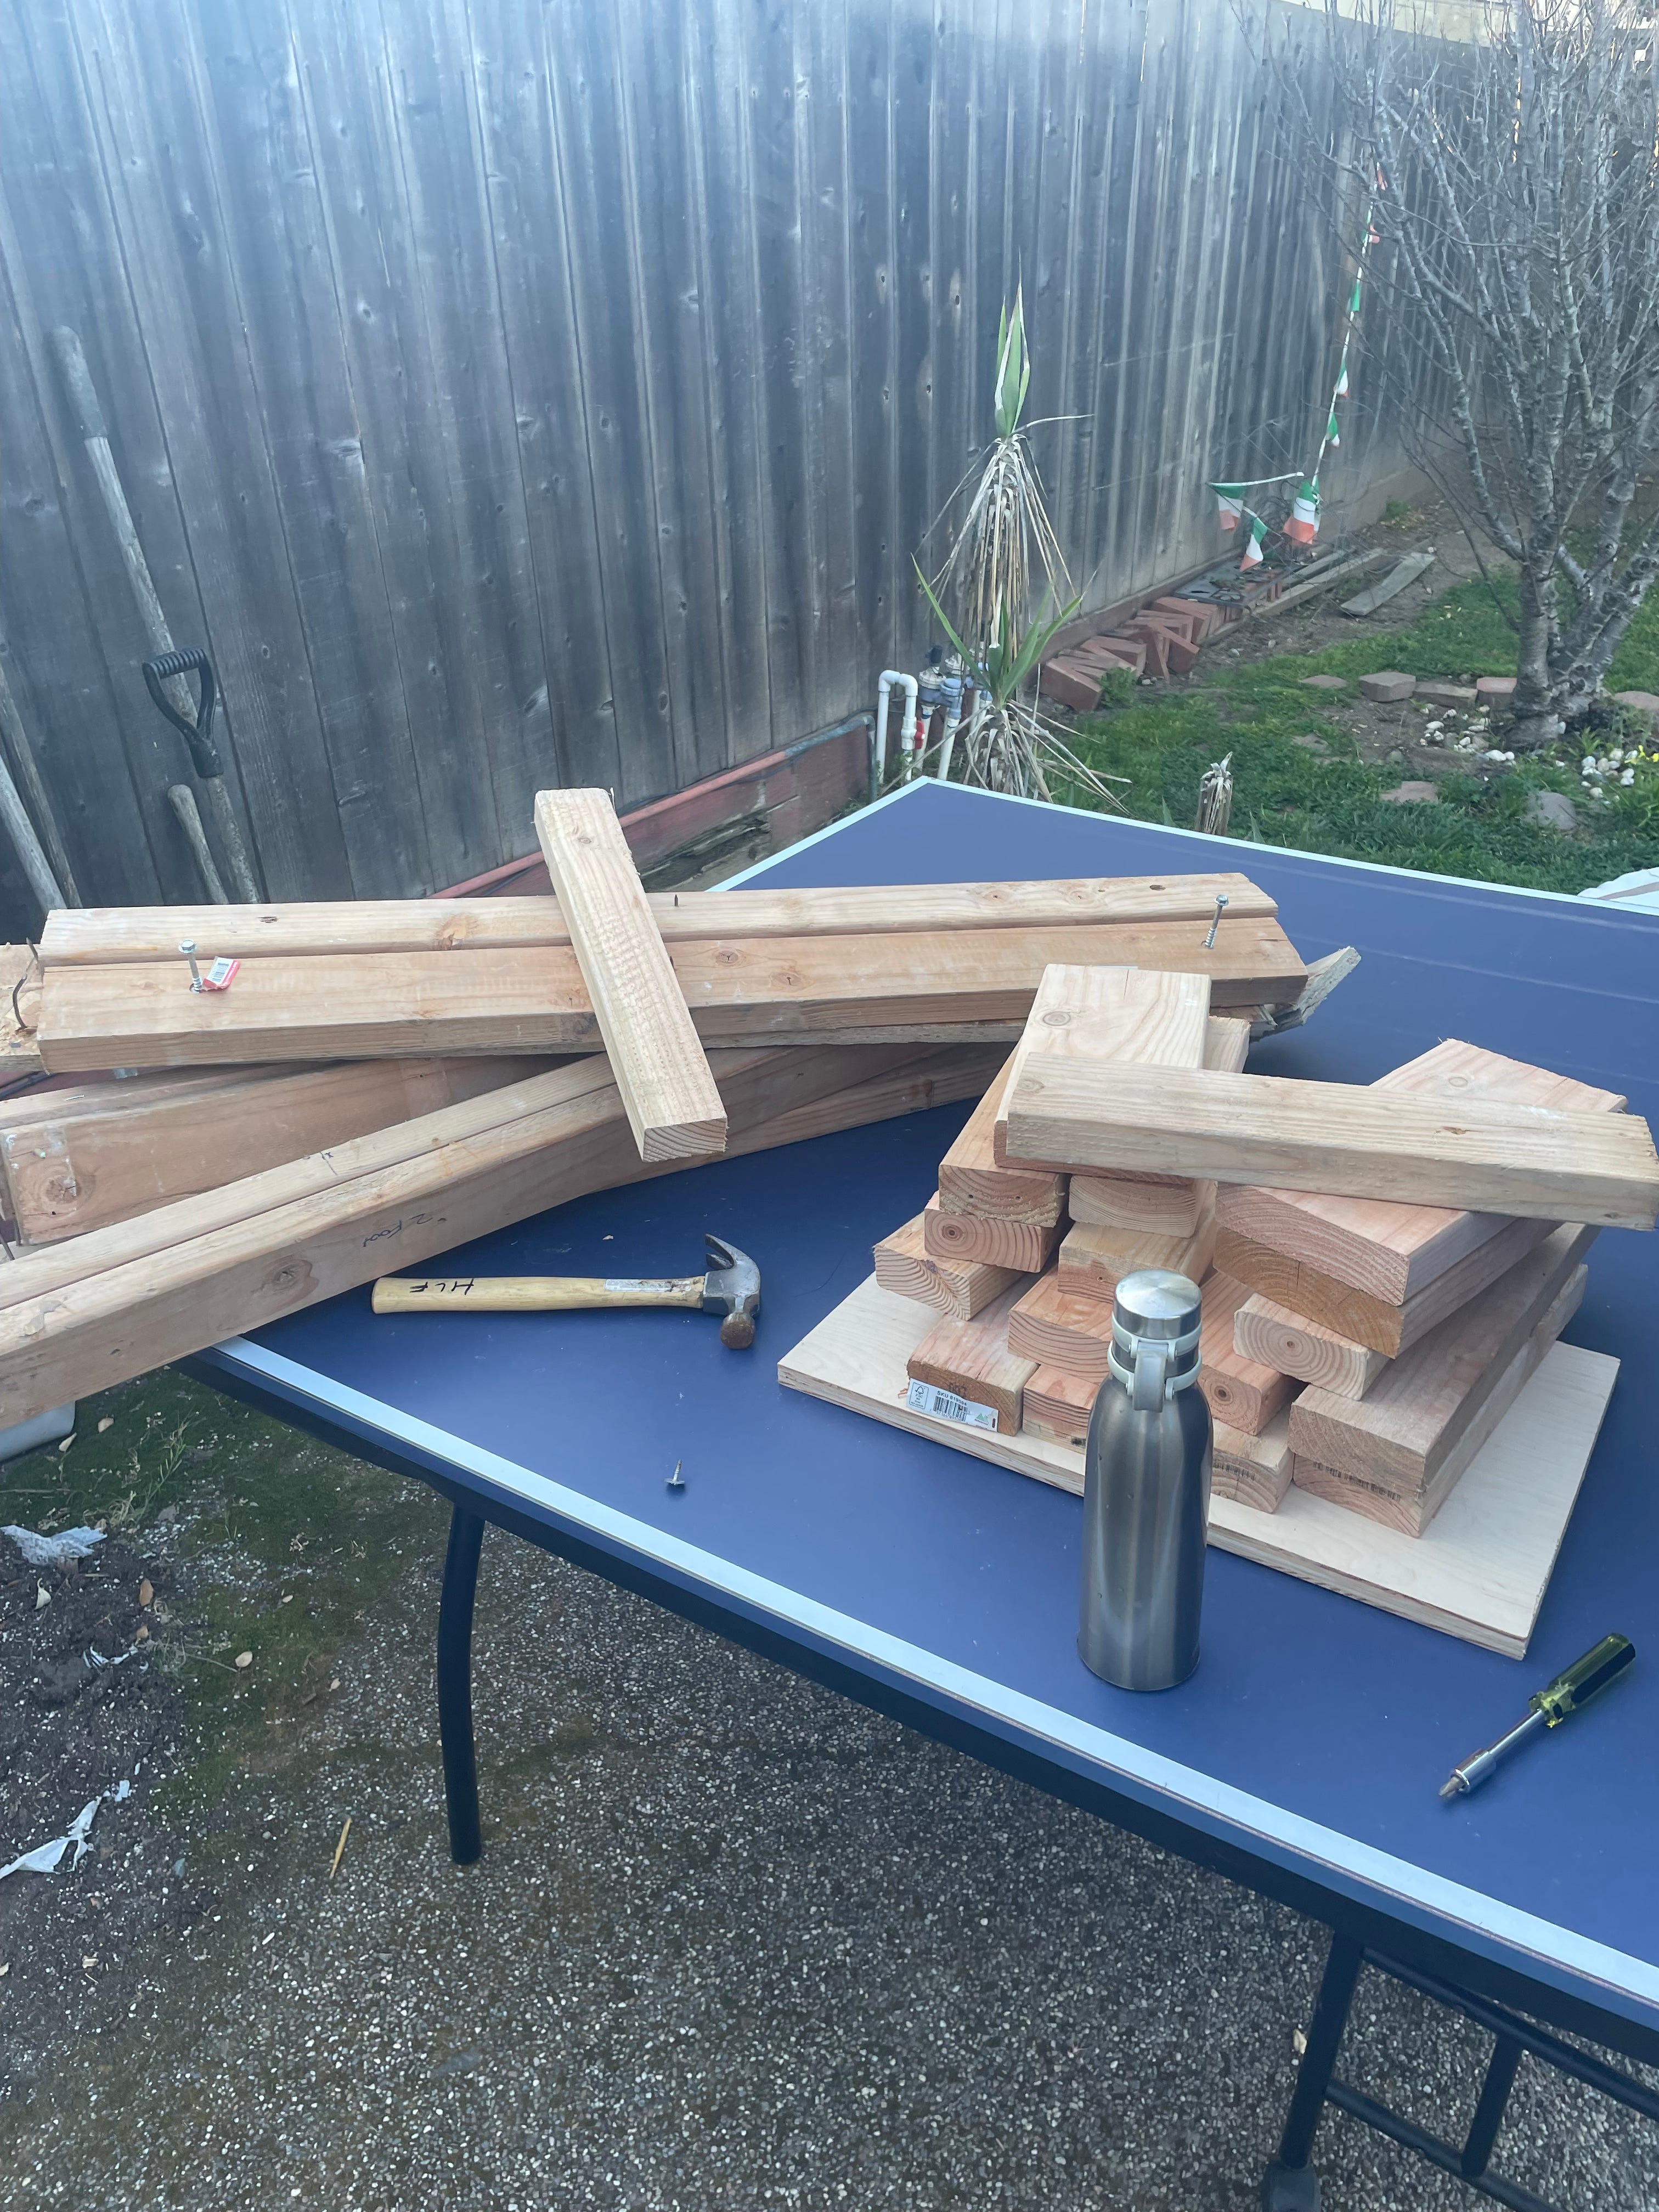
Make sure you know what tools you’re going to have at your disposal.
Know the brand of electric drill and size of bits you’re going to use, the size and type of wood you’re using, and make, at the very least, some rough measurements.
I had absolutely nothing to work with besides a basic toolkit, but my cousin Ted was generous enough to lend me a circular saw, hand saw, a drill and some clamps.
Before starting, I put together an excel spreadsheet with prices, lengths, even checked to make sure the items were in stock.
When you go to Home Depot, you’re already going to know what you need.
Now, this next part is key.
Make sure you overbuy materials that don’t actually work for the project, while forgetting to buy the one or two things you do need.
That way, when you inevitably return, you’ll need twice as many things as you initially thought.
Also be ensure that when you go in there, you ignore the well-constructed list you’ve made and start buying things because you’re vaguely familiar with them.
“Do I need washers? What do washers actually do? Better be safe and get a 600 variety pack.”
I had to make at least three trips to my local Home Depot for this project.
First, it was the wrong screws, then I thought I’d go Dutch (that’s what that means, right) and go with nails, before returning again for the right screws. There is a variety of assorted screws and nails in this table that I can’t honestly account for.
Use (some) reclaimed wood
Not only is reclaimed wood a sound environmental decision, but it gives you the moral high ground.
“Oh, I’m sorry, you think my table is shitty? Well it’s actually made of reclaimed wood. And before you ask, yes, I do compost.”
Another great thing about reclaimed wood is that it’s not going to come in a uniform size. In my case, that led to some ham-fisted congealing.
One of my 2x4s wasn’t quite long enough, so I had to cut a perilously small chunk from another 2x4 and secure it with a couple of joists, nails, and a sickening amount of wood glue.
This decision came back to haunt me later and could have been avoided by me actually buying a standard 2x4x4, but I’d already been to Home Depot too many times and was over my moral budget.
I obviously had to go out and buy most of my wood for this project anyway — which, pro tip, you can rent a truck from Home Depot to haul everything home at $19 for an hour and 15 minutes — but the reclaimed wood added a level of unnecessary difficulty that was fun, at least in hindsight.
Get a tetanus shot
This section should probably go before the reclaimed wood section.
While this is a very dumb article, if you listen to nothing else, take this sincere advice.
If you are going to embark upon on a woodworking project, make sure you’re up to date on your tetanus shots. They’re pretty much good for a decade (I think).
That way, when you nearly put one of those rusty nails through your feet, you’re not worried about going full rigor mortis in the coming days.
That’s one thing I forgot to mention about the reclaimed wood section. If you’re me, you’re going leave that wood lying in ill-advised places along the ground with the exposed nails sticking up at you.
And then, well, a nail pops through your shoe and stabs your foot.
(Warning: incoming photo of a shoe)

You might be thinking you could avoid that peril entirely by just purchasing non-rusty-nail-littered planks of wood, but then you’d be a bad person.
Regardless, rust is sort of everywhere in these projects, so you’re gonna want to get the shot.
If you need an extra push, google tetanus. It’s not great!
Lay out the steps, embark on the project
This is where I leaned on some wholesome bros on YouTube to guide me through the rhythm of the project.
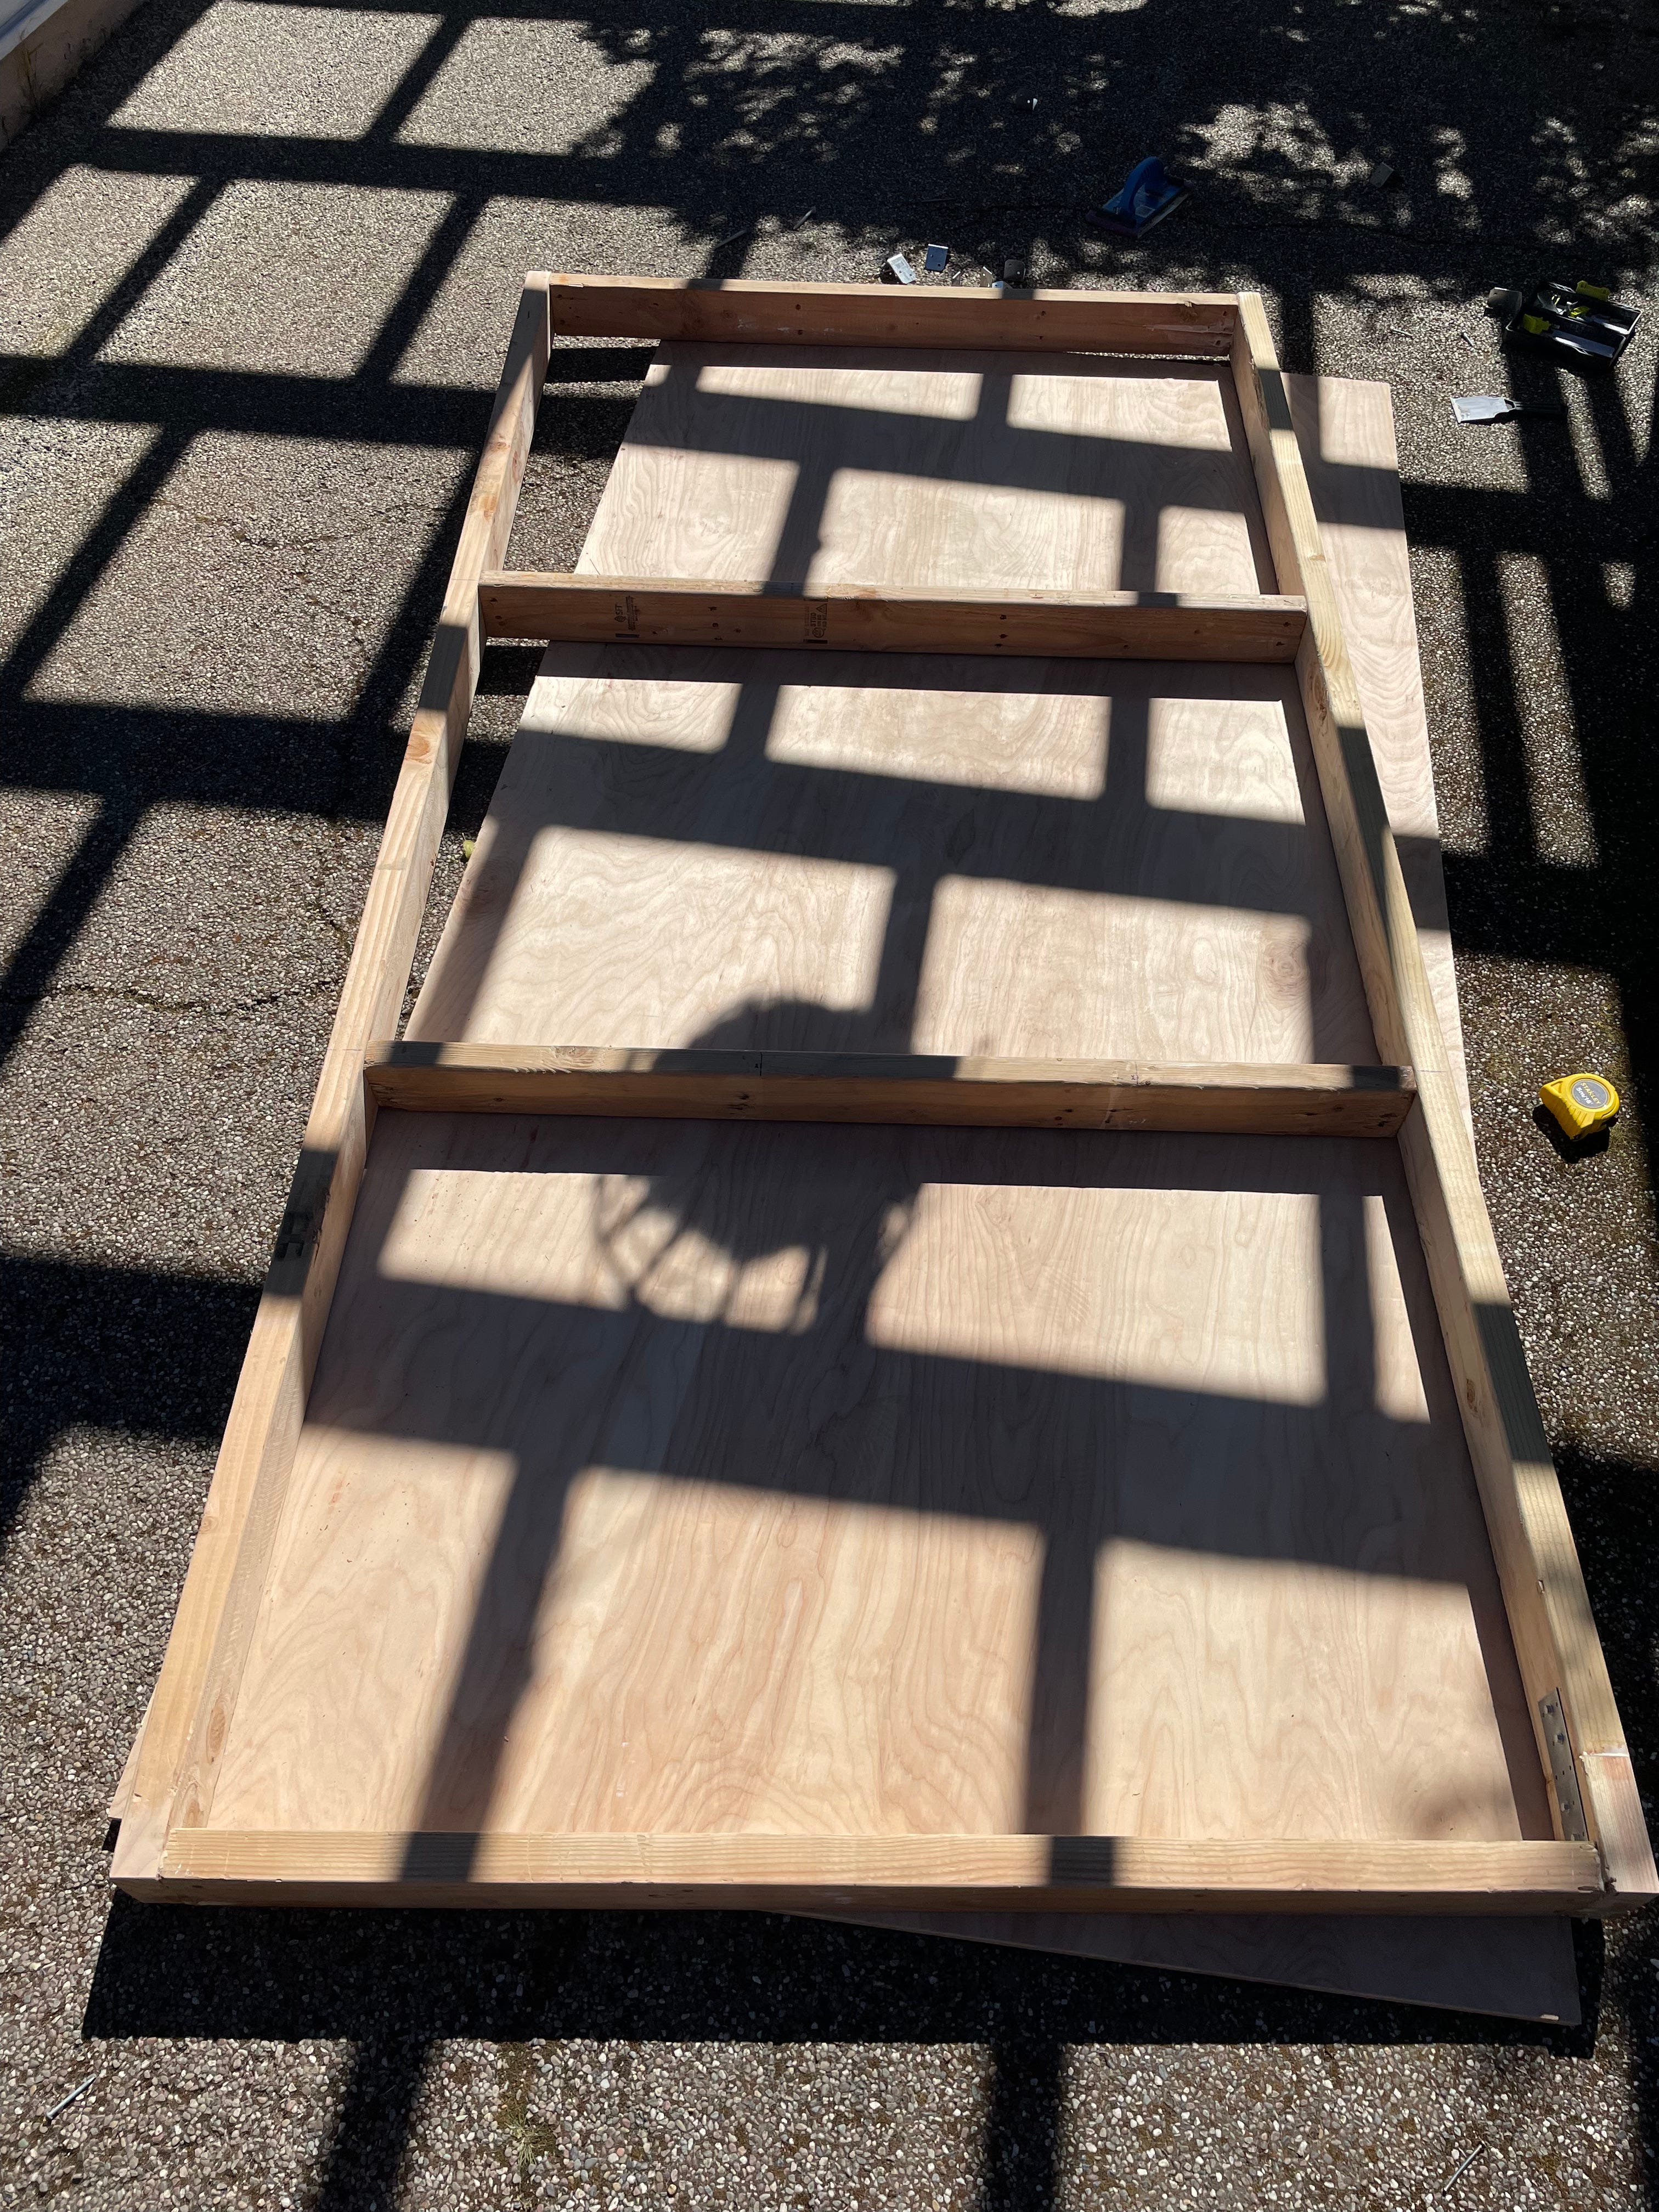
You’re going to want to line up your outer planks of wood on top of the plywood, or whatever you’re using for the top of the table.
Now you’re good to start screwing stuff together.
Realize you’ve made an error
Almost immediately.
The strong-drive screws I decided to use for the project on the advice of one of the YouTube bros turned out to be horribly ill-advised. They 1. split the wood and 2. wouldn’t go deep enough to actually recede on the sides, leaving them dangerously exposed.
So this is where the many trips to Home Depot began. I just started winging it, buying different screws and nails.
Make more errors, let your drill die, have a meltdown
I didn’t learn my lesson and bought a smaller version of strong-drive screws. These didn’t do the trick either.
Something about not be able to get two simple pieces of wood to screw together after dozens of tries broke my brain.
Then, after stepping on a couple nails, making multiple trips to Home Depot, the drill died on me. My cousin, who graciously lent me his tools, had forgotten the drill charger, so it was at this point I considered giving up on the project entirely.
The joys and terrors of NextDoor
Eventually, I regained my composure, and looked for a solution. I downloaded the NextDoor app and as a shot in the dark, asked if anyone had a spare Ryobi drill charger.
The speed of the responses was nothing short of terrifying, if not cautiously uplifting. Within an hour, three people had offered to help, and by the end of the day, I had a charger in hand.
Let me take a brief moment to talk about NextDoor.
It’s like MySpace met Craigslist met a PTA meeting.
It’s great if you’re looking to sell something, get quick advice, find a lost dog, generally anything you’d ask a neighbor for.
But it is so much more than that.
There is always some persistent debate about local municipal issues, usually affordable housing.
There are noise complaints about nearby airports, questions about stone fruit season, and tirades about highway lanes. One woman in my town posts a random question every day, which, amongst the many subjects she’s touched, asked people if they enjoy gummy worms (I think they’re fine).
My favorite are the irreverent posts, like this woman who has rocks in her car’s air filter:

And this poor, middle-aged man who is absolutely bamboozled by a joke about getting head:

This is all to say, thank you to the guy who lent me his Ryobi charger without a second thought. I appreciate you, and all the unbridled chaos that is present on NextDoor.
Back to business/God bless wood glue
Once you’ve failed a sufficient amount, things will start clicking.
The drill is charged, you’ve acquired the proper number of joists and screws and nails and even have an abundance of quality sandpaper.
All of a sudden, this thing has started coming together.
Now, as mentioned above, those reclaimed pieces of wood might not be the right length. In my case, it was actually the pre-sized planks of wood from the Depot that gave me issues.
One of the 8-footers was missing about half a foot. I have no idea how I didn’t notice that. But there wasn’t a chance in hell I was going back to exchange it.
That’s where the lizard-brained problem-solving comes in. It required me to cut a chunk from one of my spare 2x4s with the circular saw.
That part, of chopping an iffy chunk of wood with a circular saw, using a ping-pong table as leverage, well, that’s downright terrifying.
Don’t do that.
And wear eye protection when you do use a saw, and when you’re sanding.
In order to get that little chunk attached, I used those flat, metal joists in the photo and a combination of nails and long screws, which split that corner piece in two places.
But with wood glue, all things are possible.
Wood splitting? Wood glue.
Fired from your job? Wood glue.
Marriage failing? Wood glue.
When in doubt. Wood glue.

I just kept pouring wood glue into the corner of this table and in between the gaps until it was stronger than the rest of the table. Sure it looks like shit, but that’s part of the fun of it.
Start putting it all together, then nearly injure yourself
The circular saw was necessary for all the legs, which was, again, horrifying.
I had to chop a pair of 4x4x8 square blocks into 3-foot(ish) lengths.
Most of them were not cut properly because I was fearing for my life while sawing them. That meant a good couple hours of taking a hand saw to get them down to size.
But once that was done, the thing came together pretty quickly.
The only thing I didn’t consider was how I’d get the table upright, given that the legs had to be attached upside down.
I settled on standing in the middle and picking the whole thing up while it wobbled around me like a tightrope performer pretending to fall. I’d recommend getting a hand for that part.

Make sure to overpaint
At this stage, you just need to paint and screw the plywood top on. It’s the safest stage of this project, but will be no less frustrating than the rest of it.
You’re gonna get through the first layer or two near perfectly, but if you’re me, at least, there will be one spot that will bother you.
Instead of leaving it, or just adding another layer, paint over that one spot. It will look worse than before. Then you’ll have to attempt to correct the rest of the table.
You’ve now ruined the initial paint job. There’s nothing to be done. This is your burden to live with.

Lastly, when looking for a wood stain to seal the table with, make sure you don’t do any research. Grab the second-cheapest, bulkiest bottle of goop you can find. Do not check what color it will be.
Mine was a brown that I was not expecting. I also forgot to buy a proper brush to apply the stain, which meant using a half-dollar-sized brush for the entire table and rushing so it didn’t pool in one spot.
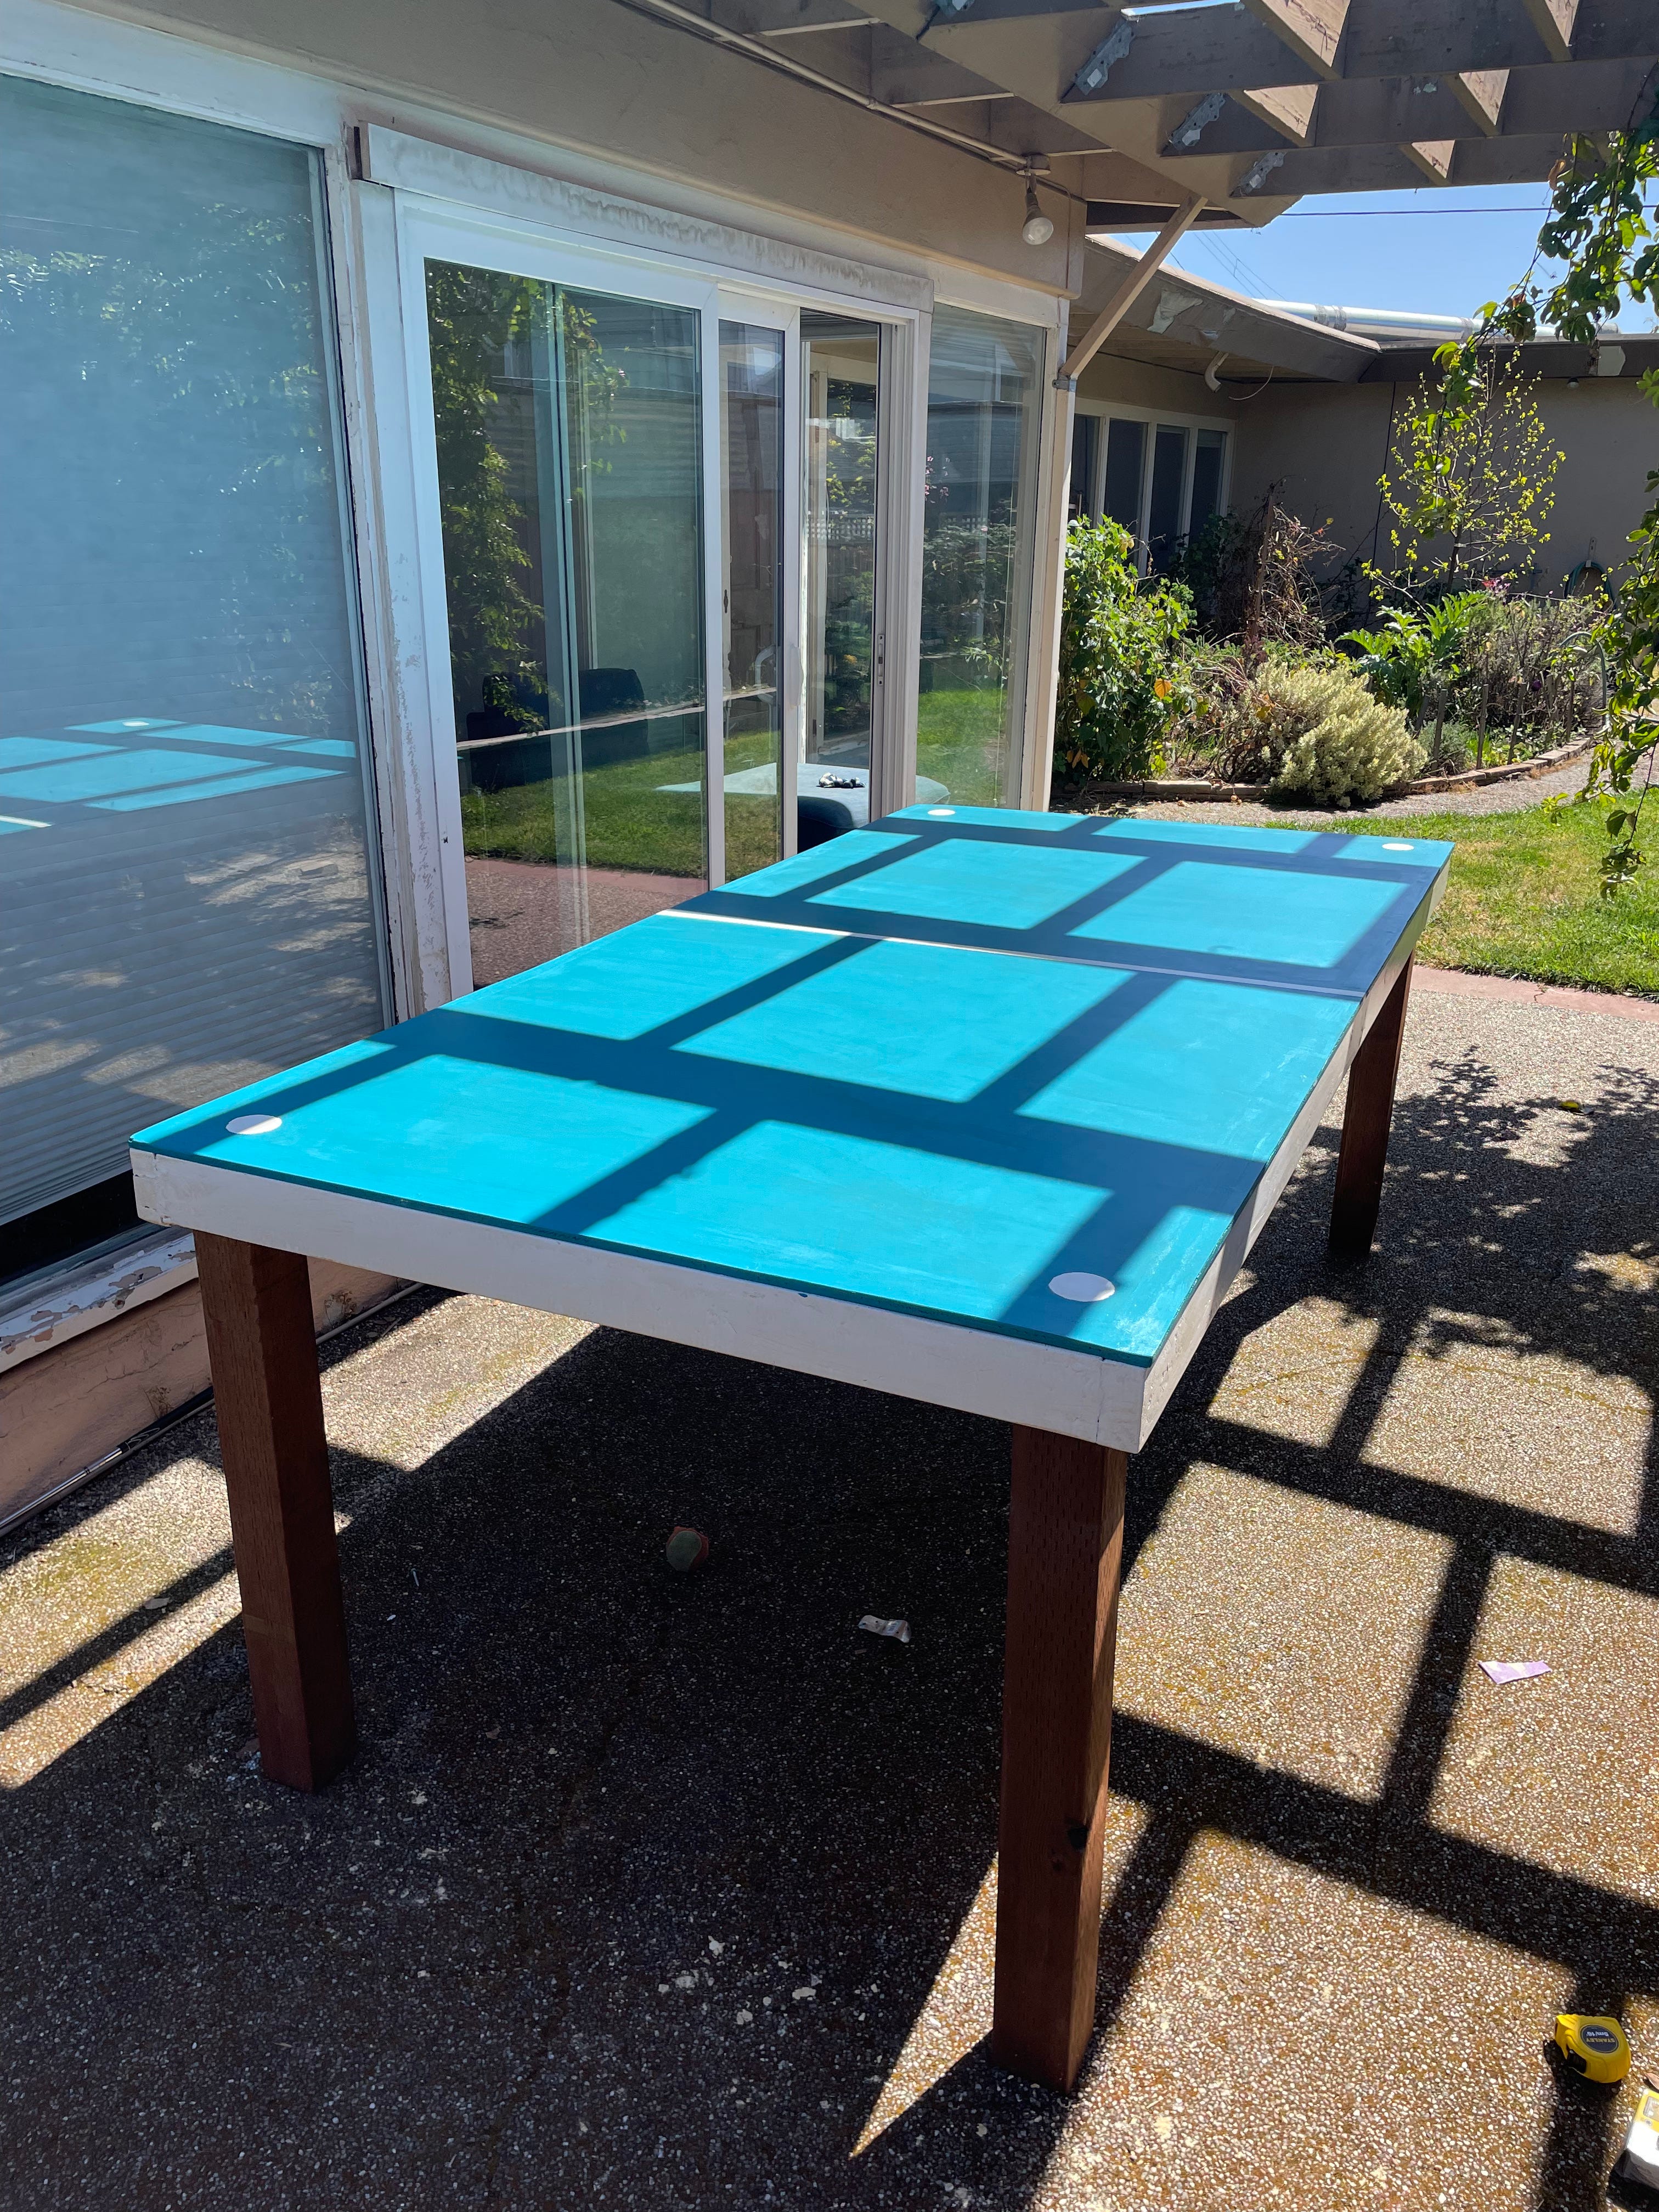
Let it dry, screw it down, marvel at your masterpiece
But hey, it got done.
There’s plenty of the process I’ve skipped over. There’s an abundance of sanding required, and because of how many little issues there were, wood filler and some sort of flat applicator were a necessity.
But as much of a shitshow as this project was, and the fact that I’ve been able to use this table for beer die exactly once, it was undoubtedly worth it.
Not much feels more rewarding than building something you can actually use, especially if you fucked up an innumerable amount of times along the way.